How to Remove Someone from Instagram’s Blocked List

See the source image

This article will demonstrate how to unblock an Instagram user’s profile. The instructions below apply to both the Instagram mobile app and the desktop website in their most recent versions.

  • How to Unblock a User on Instagram
  • Unblock Someone Using Instagram on the Web
  • View a List of Instagram Accounts That Have Been Blocked
  • What Happens When Someone Is Unblocked?
  • How to Become an Instagram Follower of an Unblocked Account
  • Can You Unblock Accounts That Are No Longer Active?

How to Unblock a User on Instagram

To unblock someone on Instagram using the Instagram app for all supported versions of iOS (iPad and iPhone), Android (Samsung, Google, and others), and Windows:

  1. Navigate to Instagram and locate the blocked user.

You can restrict your search to user accounts only by selecting the Accounts tab from the search bar.

  1. Select the profile that you wish to unblock.
  2. Select Unblock and verify that you truly wish to unblock the user.

You can now view the user’s profile and choose to follow them if you wish.

Unblock Someone Using Instagram on the Web

To unblock a user who is accessing the Instagram website via a desktop web browser on a computer:

  1. Open Instagram in your browser and navigate to it.
  2. If you haven’t already, sign in to your Instagram account.
  3. Click on Search.
  4. Enter the account’s username or the name of the person you wish to unblock.
  5. Now, from the auto-complete suggestions, select the desired user.

Instagram may indicate that the user’s account is temporarily unavailable. In this case, you must use the Instagram app for iOS or Android to unblock the account; see above.

  1. Choose Unblock and verify that you truly wish to unblock the user.
  2. That is all! On Instagram, you can now follow the user you just unblocked.

View a List of Instagram Accounts That Have Been Blocked

Yes, Instagram keeps track of all the accounts you’ve blocked. To view it in the Instagram app for iOS or Android, follow these steps:

Because the Instagram website does not provide access to the list of blocked users, you must use the app.

  1. Navigate to your Instagram profile page.
  2. Select Settings from the menu button.
  3. Click on Privacy, followed by Blocked Accounts.
  4. Tap any blocked user to access their profile, where you can follow the instructions above to unblock them.

Additionally, this can be used to unblock users who may have blocked you. Even if you have unblocked them, they will still need to unblock you.

What Happens When Someone Is Unblocked?

When you unblock an Instagram account, the restrictions that come with blocking someone are removed.

  • They’ll be able to locate you via Instagram search.
  • They can re-visit your posts and stories.
  • They’ll be able to track you once more (this will not happen automatically, though).
  • They can once again send you private messages via Instagram Direct.

When you unblock a user, they will not be notified.

How to Become an Instagram Follower of an Unblocked Account

If you unfollow someone on Instagram after blocking them, their new posts or stories will no longer appear in your Instagram stream. Additionally, you cannot follow a blocked account until it is unblocked.

To re-follow the user after unblocking them:

  1. Locate and open the user’s Instagram profile.

This works just as well in the Instagram mobile apps for iOS and Android as it does on the web.

  1. Click on Follow.

If you notice that you are no longer receiving updates from someone, check to see if they have unfollowed you on Instagram.

Can You Unblock Accounts That Are No Longer Active?

Unblocking Instagram profiles that have been deleted or removed since you blocked them may be impossible depending on the app or website. Their names will appear in your Blocked Accounts list, but you will be unable to communicate with them.

Attempt the Instagram app on a different platform if possible. We’ve seen Instagram for Android unlock users who were reported as non-existent or inaccessible by the Instagram website and iOS app.

One way to avoid having stale accounts on your Instagram Blocked Accounts list is to report suspicious accounts and activity to Instagram (Report > It’s spam or Report > It’s inappropriate in the user’s menu) rather than blocking users you believe are fake.
How You Can Unblock a Sender in Gmail

See the source image

Google Block and a filter are two ways to block unwanted email from specific senders in Gmail. To unblock an email address from a filter in Gmail, remove it from the filter. If the filter contains multiple email addresses and you want to keep blocking others, edit the filter to remove only the addresses you want to unblock while keeping the others blocked. After updating the filter, new emails from addresses removed from the filter appear in your Inbox.

This article applies to the desktop version of Gmail accessed via a web browser.

  • Find the Filter to Unblock
  • Edit the Filter
  • Delete the Entire Filter
  • Unblock a Blocked Address
  • Can’t Unblock an Email
  • Verify That No Other Filters Exist
  • Fix It With a Safelist
  • Consider These Before Unblocking

Find the Filter to Unblock

Remove an email address or domain from your list of blocked addresses in Gmail’s settings. The first step is to find the email filter.

  1. Go to Settings (gear icon) and select See all.
  2. Select Filters and Blocked Addresses.
  3. Locate the filter you want to edit or delete in the section All incoming mail filters. Name or address in bold

Edit the Filter

After locating the filter that blocks the email address, decide whether to delete it (halting the action) or edit it (removing the email address) (to unblock messages from that address only).

  1. Select Edit next to the filter to view its details.
  2. In the From field, remove all blocked addresses. The filter will continue to block any addresses left in.

Stop blocking all email addresses in the filter and proceed to Step 6, Delete the Entire Filter.

  1. Press Next.
  2. You can choose to delete emails from blocked senders, for example. Then select Update filter to save your work.

Delete the Entire Filter

Remove the filter to completely remove it and unblock all email addresses.

  1. Go back to the Filters and Blocked Addresses tab in settings.
  2. Delete the email filter.
  3. Click OK to confirm deletion.

Unblock a Blocked Address

It’s easier to unblock senders if you use the Gmail Block feature.

  1. Click on the Settings gear icon and select See all settings.
  2. Choose Filters and Blocked Addresses from the Settings page.
  3. A section for blocked addresses is at the page’s bottom. Block automatically filters these addresses to Spam.
  4. Unblock the desired address by selecting it.
  5. Select Unblock to confirm you want to unblock the address and have future mail sent to your Inbox.
  6. Any future emails from the unblocked address will go into your regular Inbox unless another filter directs them otherwise. 7.

Can’t Unblock an Email

A filter that blocks emails can be unblocked by removing an email address from it or by deleting it altogether. You can try these steps if you still don’t receive emails from that sender.

Verify That No Other Filters Exist

Possibly another filter blocked or redirected the email you unblocked. Do a search for that address in the settings’ Filters and Blocked Addresses page. In this case, you can edit or delete the other filter to ensure that the emails go to your Inbox folder instead.

Maybe it’s spam.

This filter may be sending unwanted emails to the Trash folder. Because Gmail might be marking these messages as spam if they don’t go to your Inbox after removing the filter,

  1. Go to the Spam box. Look for the Spam folder in the More section if you have custom Gmail folders.
  2. Read the non-spam email.
  3. Select Inbox in the banner at the top of the message.

If the banner isn’t visible, look for the Spam label next to the subject line. Remove the label and send the message back to the Inbox.

  1. Your Inbox will now receive this message and others like it.

Fix It With a Safelist

You can also safelist an email address to stop Gmail from classifying it as spam. Safelisting will unblock emails if there is no filter sending them to the Trash or another folder.

Consider These Before Unblocking

A filter that blocks an entire domain should not be deleted. Domains hold many email addresses and potential emails. Don’t delete the whole filter if you want to keep blocking the @spamsite.org domain from sending spam.

Notify me of updates to this page. The removal of all filter options results in an error message. To stop auto-deleting emails, remove the entire filter.

How to Resolve an Issue With Yahoo Mail Not Receiving Emails

See the source image

Whether you’re missing an important email or aren’t receiving any messages at all, it can be a major issue if your Yahoo Mail inbox stops working properly. At any time and for a variety of reasons, your account may cease receiving emails. The following are some troubleshooting steps to take if Yahoo Mail is not receiving emails.

The Factors That Contribute to Yahoo Mail Delivery Issues

Several factors may contribute to Yahoo Mail’s downtime, depending on how the issue manifests. However, in general, the major causes are as follows:

  • Account-related issues
  • System outages
  • Error by the user

While some of these causes have straightforward solutions, others may require you to wait for the system to self-correct.

How to Resolve an Issue With Yahoo Mail Not Receiving Emails

These solutions should be applicable to all versions of Yahoo Mail that are accessible via the web or mobile devices.

  1. Conduct a search of your spam folder. Yahoo’s automatic bulk-mail filter does an admirable job of preventing unwanted emails from reaching your inbox, but it occasionally makes errors. You should check your spam folder to see if the email(s) you expected ended up there by accident.
  2. Examine your filters. Yahoo Mail includes an automatic message sorting feature that allows you to sort messages as soon as they arrive. While this is a convenient feature, similar to spam, it is possible that a filter you set up will capture emails you did not intend.

Check the Filters section of your Yahoo Mail settings before going through all of your folders. This will assist you in identifying and fine-tuning any issues with the rules you’ve established. Additionally, you can inspect your filters to determine which folders they use to assist in narrowing down your search.

  1. Scan the message for a “Reply-to” address. One of Yahoo Mail’s features is the ability to specify a different email address for your recipients to respond to. If you configure one, their responses will not be routed to your Yahoo inbox, even if they were sent from that account. Examine the Mailboxes section of your settings. In order to ensure that all of your messages are being delivered to the correct mailbox.
  2. Verify your list of blocked addresses. It’s possible that you’re not receiving emails from a particular recipient because you’ve blocked their address, whether intentionally or unintentionally. To see if any emails have been blocked, navigate to the Security and Privacy section of your settings.
  3. Send an email to yourself. Even if you are able to access your Yahoo Mail account, this does not guarantee that the service is functioning properly. Sending an email to your account and checking to see if it reaches the inbox is one way to determine if the delivery system is functioning properly.
  4. Sign out and then sign back in. If you’re using the Yahoo Mail mobile app on an Android or iOS device, you may experience a loss of connection to your account. Logging out and back in may assist in reestablishing the connection.
  5. Clear your browser’s cache. It is possible that the data and cookies you collect while browsing may have an effect on how websites, including Yahoo, behave. Close and restart first, and if that does not resolve the issue, you can easily reset Chrome or restore Safari.
  6. Alternately, you can use a different Yahoo Mail platform. If you’re having trouble receiving emails via the website, try accessing them via the dedicated mail client on your phone or the official Yahoo Mail app.
  7. Ensure that all information is current. Yahoo Mail updates in the background, and you may not be aware when a new version is available. Certain changes may cause the platform to fail to function properly on the current version of the browser or app you’re using. So you should check for updates and see if that resolves the issue.

How to Use Mac OS X Mail to Locate and Insert Special Characters

See the source image

If you want to type “Moscow” in Cyrillic, “nirvana” in Devanagari, and converse in true ancient Greek style about your ancient Greek homework, the letters on your keyboard may not suffice.

Fortunately, Mac OS X makes it simple — even enjoyable — to input nearly any (Unicode) character in email messages.

Using Mac OS X, Include Any International or Special Character in an Email

To include any character in your email, use the following syntax:

  • From the Apple menu, choose System Preferences…
  • Select International from the menu.
  • Select the Input Menu option.
  • Verify that the checkbox for Character Palette is selected.
  • Return to the email you are currently composing.
  • Select Show Character Palette from the input menu.
  • Locate the required character (browse by category or, for Easter languages, by radical, or use the search bar, which finds characters by Latin transcription or description).
  • To insert a character, double-click it.

Type multiple foreign characters easily

If the character palette appears clumsy when inserting longer text sequences, you can enable a keyboard layout that places the required characters within easy reach.

  • From the Apple menu, choose System Preferences…
  • Select International from the menu.
  • Select the Input Menu option.
  • Verify that all desired input methods and keyboard layouts are checked.
  • While composing your message, click the input menu to choose the keyboard layout or input method you wish to use.
  • After typing is complete, use the input menu to revert to your default keyboard layout.

If you’re unsure of the location of a particular character on the keyboard, check Keyboard Viewer in the International | Input Menu system preferences and select Show Keyboard Viewer from the input menu.

Utilize Accents and Umlauts Immediately

Finally, if only accents, cedillas, or umlauts are required, no changes are necessary. The standard US keyboard includes dead keys that make it simple to add frequently used accent marks. Several common combinations (with the first line representing the accent key, the second line representing the character typed after the accent key, and the third line representing what appears on screen):

  • Option-E
    • e u i o
    • é ú í ó
  • Option-`
    • e u i o a
    • è ù ì ò à
  • Option-I
    • e u i o
    • ê û î ô
  • Option-N
    • n o a
    • ñ õ ã
  • Option-U
    • e y u i o a
    • ë ÿ ü ï ö ä

Mail for Windows Free Email Program Review

See the source image

Mail for Windows is a basic email client that lets you manage multiple accounts securely, but lacks advanced features. You can’t create email groups or message templates.

IMAP, Exchange and POP Accounts in Mail for Windows

In addition to the classic (and rapidly disappearing) POP accounts, Mail for Windows supports IMAP (such as Gmail or iCloud Mail) and Exchange (such as Outlook 365).

The server stores all messages and folders, which Mail then syncs. By default, Mail for Windows configures a new account to only synchronize messages from the last month (or the last three months).

Of course, this is a good plan. How often do you really read messages from three months ago? Not only does this save time and bandwidth synchronizing, but it also saves you from having to deal with old emails.

Mail for Windows allows you to change the synchronization option to make all messages available. Of course, Mail for Windows should make this change more obvious.

A Brief Overview Description

In addition to managing IMAP, Exchange and POP email accounts in Windows,

  • For each email account, you can control how much mail (up to a month’s worth) is synchronized while preserving local storage.
  • An adaptive synchronization schedule balances getting new messages with laptop battery life.
  • Multiple accounts’ inboxes and folders can be combined into a single account, and Mail for Windows can organize messages into threads.
  • You can set the Mail app to not automatically download remote content to protect your privacy.

Email text can be formatted with rich formatting including images, and Mail for Windows also supports email attachments.

  • Create an email signature for each account, which is added to emails as you compose them.
  • Simple search finds text quickly in full message text and across folders, but no search operators to narrow results.
  • Calendar integration has Emails with dates and times can be easily added to your calendar.
  • You can set up an Outlook.com account to automatically reply to incoming messages using the Outlook Mail vacation auto-responder interface.
  • Mail for Windows can notify you of new emails via a banner or sound in the Windows action center.
  • The Mail app window’s interface color and background image can be changed, as well as the day and night themes.
  • Mail for Windows 10 compatible

A Good Message Editor

Whatever you think of it, Mail for Windows is resource conscious. A “smart” schedule adapts to how often you receive new mail and how often you deal with it. Yes, you can set your own time.

What if you got your emails into Mail app? There’s a shortcut to spam-marking in Mail for Windows.

When you reply or write a new message, you’ll find a handy editor that lets you easily apply formatting. Of course, you can attach images. Unexpectedly, Mail does not directly integrate with OneDrive (or other file-sharing services) for sending files larger than attachments.

Signatures are also commonly attached to email ends. You get one text signature per account (no images or links), and it is either automatically included or not; you cannot set up multiple signatures per account or choose just when sending.

Mostly Missing Automation

Signatures can’t be used as text snippets in Mail. Nothing else can, either. No message templates, text modules, or suggested replies in Windows Mail.

Other automation options in Mail are limited. Mail for Windows cannot sort or mark mail based on senders, nor can it file messages based on recipient.

(For Outlook Mail accounts, the Mail app lets you set the server’s auto-responder. A similar interface for general server-side rules could be useful for other account types.)

A Search Without Labels

Filters cannot be used to apply labels or categories in Mail for Windows. This is because there are no filters, labels, or categories. Messages cannot be delayed either.

Mail app has folders and search for mail organization. Folders work as expected, and moving messages is as simple as using the toolbar or dragon. Oddly, there is no keyboard shortcut, and moving messages between accounts is not possible, either (neither is copying messages at all, by the by).

Search in Mail for Windows is generally satisfactory. This is due to the ease of use: enter your search terms, hit “Enter,” and get results. You can search the current folder or the account in Mail (though not across accounts).

You can also send Mail to the server to continue the search and return all results. This is a very useful way to access non-synchronized mail.

If you want precise results, you’ll miss search operators, filters, and sorting. Mail still has search.

Linked Inboxes to Unify Account

You may miss the sorting options in the inbox (or any other folder). Mail app always sorts by date. You can filter the folder to only show unread or flagged messages.

If you have multiple accounts, you will need to switch between them or use Mail for Windows to merge them. Linked inboxes combine inboxes, sent mail, and archive folders into one big account.

You can now search across accounts, though the results can be confusing as messages are not attributed to their origins.

Commanding Mail for Windows by Swipe, Mouse and Keyboard

Whether you keep your inboxes separate or merged, Mail for Windows lets you set up swipe actions. For example, you can archive, delete, or junk mail.

Sadly, there are no similar configuration options for the toolbars and context menu actions available, which can be a bit haphazard at times. They work well enough that you can do most of what you want.

Sadly, keyboard shortcuts are not the same. Even in a program that works well with a screen (and no keyboard), keyboard shortcuts should be considered. Moving mail or reading mail by the screenful are two examples of missing shortcuts in Mail for Windows.

No Opening Mail and Drafts in Separate Windows

Speaking of the area where Mail app displays your messages, there is no way to minimize or otherwise move a message draft out of the way while composing it so you can quickly refer to, say, the original message and then return to the draft.

Even if there is a way, I have yet to discover it in Mail for Windows. Mail app support is limited to a few questions.

Calendar and Contacts

Calendar is included with Mail for Windows, and it works well to synchronize and manage your schedule. A time and date in an email can help Mail app create a new event in the calendar with the time and the subject as a title. Sadly, that is the extent of the two programs’ integration.

Contacts are kept for Mail, and integration is limited. Another omission is the ability to create contact groups to easily mail multiple recipients. The Mail app has no real contact picker; it’s all auto-completion.

Mail for Windows is a basic email client that lets you manage multiple accounts securely, but lacks advanced features.

You can’t create email groups or message templates.

Pros vs. Cons

Pros

  • Access multiple IMAP and POP email accounts with Mail for Windows.
  • A powerful editor allows you to quickly compose richly formatted emails.
  • Actions are easily accessible with swipe gestures and quick toolbars.
  • Mail for Windows 10 allows you to set up email signatures per account and use HTML signatures.

Cons

  • By default, Windows Mail shows only a portion of mail (with no indication whether more mail is waiting at the server)
  • You can’t set up rules to filter mail or perform other tasks.
  • The lack of keyboard shortcuts in Windows Mail (such as moving messages)

How to Correctly Separate Multiple Email Recipients

See the source image

With this piece of article, you will learn how to include multiple email addresses in the To: header field, or how to add additional recipients via the Cc: or Bcc: fields. When inserting multiple email addresses into any of these header fields, ensure that they are properly separated.

Separate with a Comma

Most — but not all — email clients require that multiple email addresses be separated by a comma in any of their header fields. The correct way to separate email addresses in the header fields of these email providers is as follows:

[email protected],[email protected],[email protected]

and so forth. Commas are the preferred method of punctuation in nine out of ten email programs. They work perfectly well, unless you are using Microsoft Outlook. Certain email clients, such as Gmail for Android, accept either a comma or a semicolon as the separator.

A Violation of the Rule

Outlook and any other email program that searches for names in the last name, first name format and uses the comma as a delimiter may encounter issues if you use commas to separate email recipients. To separate multiple addresses in their header fields, email clients that use commas as delimiters typically use semicolons. Multiple addresses are entered in Outlook by default using semicolon separators.

[email protected];[email protected];[email protected]

You should be fine if you switch to using the semicolon as a separator in Outlook. If you have difficulty adjusting to the change or frequently forget and receive the name could not be resolved error message, you can permanently change the Outlook separator to a comma.

Change Outlook Separator to a comma

In Outlook 2010, you can change the preferences to use a comma rather than a semicolon in the headers by going to File > Options > Mail. Select the checkbox next to Commas can be used to separate multiple message recipients in the Send messages section, and then click OK at the bottom.

Navigate to Tools > Options > Preferences in Outlook 2007 and earlier. Select E-mail Options > Advanced E-mail Options and check the Allow comma as address separator check box. To save and return to Outlook, click OK on any open windows.

The Best Ways for Managing and Controlling Email Threads

See the source image

On a cellphone, an email thread works the same way it does on a web or desktop email application. While most email clients default to grouping emails into threads, you can usually edit your email preferences to view your messages individually. We’ll show you how to manage threads on iOS, Android, and Windows Mobile devices in this guide.

  • Email Threading on an iOS Device
  • Email Threading on Gmail on an Android Device
  • Also, email Threading on Windows Mobile Devices
  • Etiquette for Email Threads

Email Threading on an iOS Device

The built-in Mail application on Apple iOS includes several settings that control email threading. By default, email threading is on enable mode.

  1. Select Mail from the Settings menu.
  2. Scroll down to the Threading section.
  3. You have the following options:
  • Organize by Thread: This setting determines whether or not email threading is used at all. Toggle this off to completely disable threading. By default, “on” is selected, which displays a green icon.
  • Collapse Read Messages: This option allows you to collapse previously read messages.
  • Most Recent Message on Top: This is disabled by default, but it appears to be a useful feature to enable. If Mail does not automatically display the most recent message at the top, you will need to scroll through potentially multiple messages to locate the most recent.
  • Complete Threads: This setting organizes email messages into threads regardless of their origin.
  1. To enable any or all of the options, toggle them on.

Email Threading on Gmail on an Android Device

Android devices running Android 5.0 Lollipop use Gmail as their default email application, replacing the previous Android application called simply Email. Email threading (also known as the conversation view) is enabled by default; however, if it is not, follow the steps below to enable it:

  1. Open Gmail and in the Inbox, click the three-line icon to the left.
  2. Scroll to the bottom, past all of your folders, and click Settings.
  3. Navigate to General settings.
  4. Check the Conversation View checkbox.
  5. Return to your email inbox to view your threaded emails.

Email Threading on Windows Mobile Devices

Email threading—also known as the conversation view—is enabled by default on Windows mobile devices and phones. To modify these settings, follow these steps:

  1. Open the Mail app and tap Settings in the bottom left corner (the gear icon or three dots).
  2. From the context right pane that appears, select Options.
  3. Toggle Show messages arranged by conversations on or off using the toggle.

Etiquette for Email Threads

Here are a few pointers to keep in mind when participating in an email thread, particularly one that involves multiple users.

  • Remain on topic, i.e. do not stray from the initial subject.
  • Remove superfluous images (such as business logos or advertisements) from forwarded emails to avoid clogging recipients’ inboxes with fluff.
  • Include a person’s name in a reply or forward if it contains his name. This point has the potential to generate a great deal of conflict and confusion, so proceed with caution. Obviously, if the email thread is private, you will know when copying someone is appropriate. However, when you introduce a new member to an existing thread, it is usually because a new issue involving him has surfaced.
  • If you do add a new user to a thread, notify existing recipients. This is a simple courtesy to ensure that all recipients are aware of who is participating in the discussion.
  • Clarify the points you’re making, particularly if they’re in reference to an earlier email buried deep in the thread.

How to Find Anyone’s Email

See the source image

This article describes several methods for finding someone’s email address.

  • Find the Email Address On Social Media
  • Find Their Email Address on the Internet
  • Verify Email Addresses in Web Directories or White Pages
  • Guess Someone’s Email Address
  • Using an Email Scraper to Find an Email Address
  • Find the Invisible Web

Find the Email Address On Social Media

You may be able to find the person’s email address by searching their social media accounts, such as Facebook, Twitter, Instagram, and LinkedIn.

Search for them by name, age, school, company, hometown, or any other information you know about them on each of those social media platforms.

Even if the profile page isn’t public, people sometimes leave their email addresses visible so non-friends or followers can contact them.

Find Their Email Address on the Internet

A web search may yield a person’s email address. A web search engine can quickly search millions of websites, making it ideal for finding a specific email address.

To get the best results, use a big search engine like Google. You can try to filter the results using Google’s advanced search commands.

The results are refined to only show instances where both the first and last name are present (for example, “Marietta Johansson”). If the person you’re looking for has a common name, like John Smith, you’ll need more information.

You could refine the search by adding the person’s hometown and birth year (for example, “Marietta Johansson Brooklyn 1992”).

If that search yields too many results, you can add popular internet email domains (for example, “Marietta Johansson Brooklyn 1992 gmail.com”).

In some cases, searching for mailto may yield better results, but this may not always be the case.

Verify Email Addresses in Web Directories or White Pages

The internet has many email address repositories, from public records to web directories.

If you know the person’s name and location, you might find their email address on Whitepages.

Guess Someone’s Email Address

Most organizations assign email addresses by name, not by choice. You can exploit this by guessing the email address’s syntax. This method requires knowledge of the person’s workplace.

Separate the first and last name with a comma. If you look up a company’s email directory online and everyone’s email starts with their first initial and last name, try this.

John Smith’s email address would be [email protected] if the company’s website used the firstinitial.lastname format.

Assuming that all other employees use the same address, [email protected] is likely to be used by all employees of a company. Emma Osner’s email address would be [email protected].

Using an Email Scraper to Find an Email Address

Some programs can search a web page or a website for email addresses and return a list of them. When an email address is hidden behind a form or exists on the website but you don’t have time to look for it.

Email Extractor, for example, is a Google Chrome extension that searches web pages for email addresses.

For the first dozen successful searches, VoilaNorbert is also free. Enter a name and a website domain to get any email addresses that match. It’s like Hunter.

Find the Invisible Web

If you know where to look, the invisible web is a goldmine of data. Pipl, Zabasearch, and other obscure search engines are designed to search the dark web.

Why You Need To Encrypt Your Email?

See the source image

This article explains why and how to encrypt emails.

  • Do you need to encrypt emails?
  • Why Encrypt Your Email?
  • What it means to Encrypt an Email?
  • How does Email Encryption work?
  • Why Encrypting All Emails Is Vital?

Do you need to encrypt emails?

Many people doubt security is real. You don’t need complicated passwords, antivirus software, or firewalls. It’s all a ruse to scare people into buying their products and services.

There are simple steps everyone can take to secure their computers and networks, but the news is full of hype. For example, by the time it appears in a newspaper or magazine, it is likely too late for you to act.

However, you should consider encrypting your email communications as a common sense measure. Send a picture postcard to a friend or family member while on vacation to say “wish you were here.” An envelope is more likely to be used for a personal letter to the same friend or family member.

Why Encrypt Your Email?

The extra key to your house is hidden under the large rock to the left of the back porch, so you might want to send it in a security envelope with hatched lines. Other options include sending a letter certified, requesting a return receipt, and verifying a package’s contents.

So why send personal or sensitive data in an unprotected email? Sending information in an unencrypted email is like writing it on a public postcard.

What it means to Encrypt an Email?

Cryptography prevents all but the most determined hackers from intercepting and reading your emails. Using a personal email certificate from Comodo, you can digitally sign and encrypt your messages so that only the intended recipients can see them. Fill out a short and simple registration form to get your free certificate.

That adds a benefit. Using a personal email certificate to digitally sign your messages can help reduce spam and malware distribution. If your friends and family are used to receiving messages from you with your digital signature, they will recognize an unsigned message with your email address spoofing as the source and delete it.

How does Email Encryption work?

Typical email encryption uses a public and private key pair (this sort of encryption is also known as Public Key Infrastructure or PKI). Your private key is only yours. Your public key is given to anyone you choose or made public.

Someone sending you a private message would encrypt it using your public key. Because decrypting such a message requires your private key, anyone intercepting it would be left with gibberish. In order to prove that an email is truly from you, you can use your private key to digitally “sign” it.

Why Encrypting All Emails Is Vital?

Notably, you sign or encrypt all messages, not just those deemed confidential or sensitive. It’s possible for an attacker to intercept your email traffic and see that 99 percent of it is unencrypted plain-text and only one message is encrypted. It’s like adding a bright red neon “Hack Me” sign to the message.

Even a dedicated attacker would struggle to decrypt all of your messages if you encrypt them. After decrypting 50 messages that say “Happy Birthday,” “Do you want to golf this weekend?” or “Yes, I agree,” the attacker is unlikely to bother you again.

Mozilla Thunderbird 52

See the source image

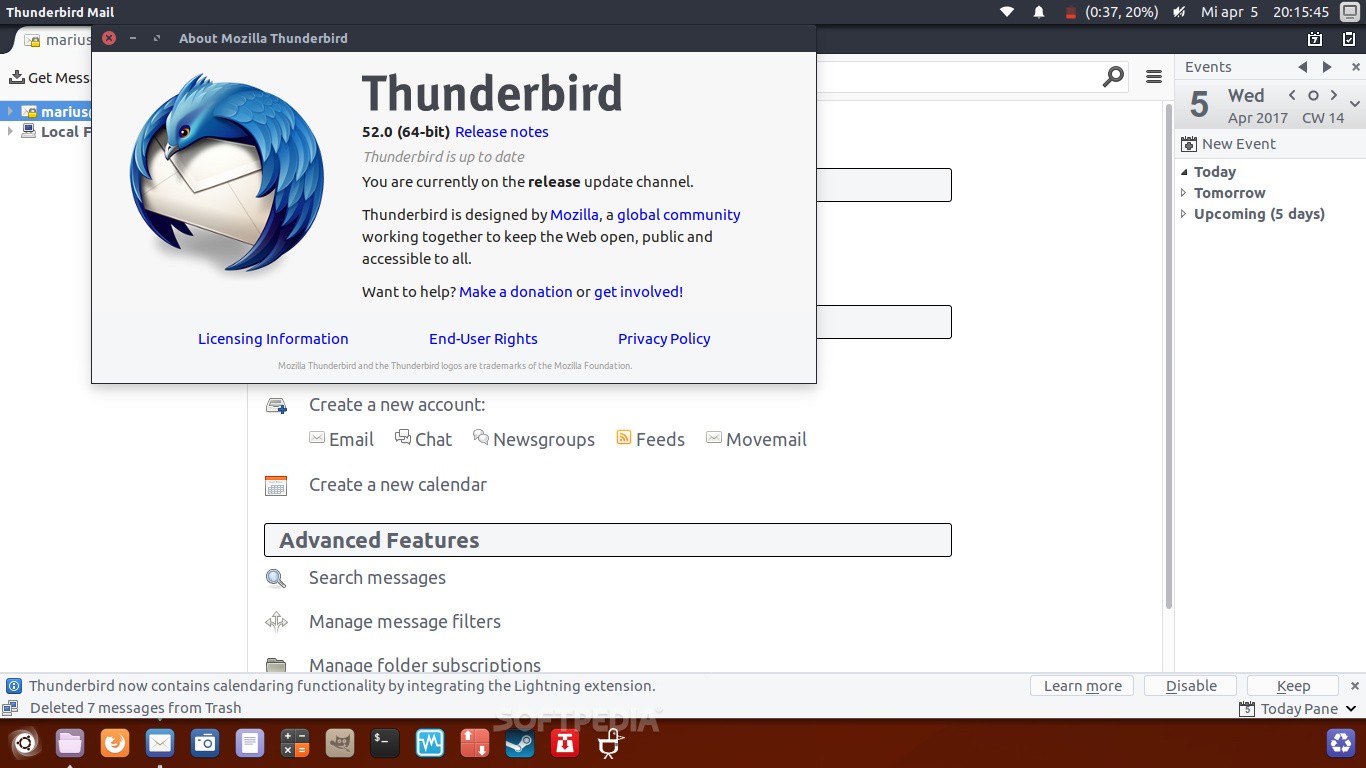
Mozilla Thunderbird 52 is a free, full-featured email and chat client with an RSS feed reader and newsgroups support. It lets you manage multiple email accounts with advanced filtering.

Thunderbird 52 Features

Introducing Mozilla Thunderbird 52. Included are:

  • Mail Account Setup Wizard: The wizard handles IMAP, SMTP, and SSL/TLS settings. It checks Thunderbird and selects the correct settings after entering your name and password.
  • Multiple-Channel Chat: Chat with contacts from Facebook, Google Talk, IRC, Twitter, or XMPP. Find old emails and search past conversations.
  • Attachment Reminder: When your outgoing email contains the word “attachment” or a similar term, Thunderbird prompts you to attach the file.
  • Personalized Email Addresses: Thunderbird allows you to create personalized email addresses. The email service does it for you.
  • One-Click Address Book: Add contacts by clicking the star on their message. Add more info or a photo in two clicks.
  • Tabbed Email: Thunderbird, like Firefox, added Tabbed Email. With tabbed emails, you can quickly switch between them.
  • Search Tools: Thunderbird indexes emails and chats for quick searching. The results are tabbed for reference.
  • Quick Message Archive: If you don’t need an email message but don’t want to delete it, press the A button.
  • Web Search inside Thunderbird: In-browser web search means you never have to leave Thunderbird. To search for a term, type it into Thunderbird’s search field. To search the web for an unfamiliar term or concept in an email, right-click it and select Search the Web for.
  • Quick Filter Toolbar: Input words into the Quick Filter search box for near-instant results. You can also filter by New Messages, Tags, or Contacts.
  • Activity Manager: Thunderbird’s Activity Manager provides a summary of your browser’s interactions with your email provider.

Customize Thunderbird Experience

You can customize Thunderbird’s email experience in several ways:

  • Personas and Themes: Personas are lightweight skins that change Thunderbird’s appearance. Hundreds of personas are downloadable. You can also download Themes that change Thunderbird’s icons.
  • Smart Folders: If you have multiple email accounts, Smart Folders combine Inbox, Sent, and Archive folders. Instead of visiting multiple Inbox folders, make one stop.
  • Add-ons Manager: There’s no need to leave Thunderbird and go to an add-ons website. View descriptions, ratings, and recommendations for available Thunderbird add-ons from the Add-ons Manager.
  • Filelink Large-File Management: Configure Filelink to handle large file uploads. Choose from popular file-sharing sites like Box, YouSendIt, and Ubuntu One.

Security Features

Thunderbird protects your email by:

  • Anti-phishing: Thunderbird guards against being duped into giving out personal information by flagging phishing attempts. It also alerts you when you click a link to a website other than the one specified in the message.
  • Privacy and Do Not Track: Thunderbird blocks remote images in emails to protect your privacy. Thunderbird’s Search the Web feature includes a Do Not Track option. Other requests can use an add-on to use it.
  • Automated Updates: It also notifies you when a security update is available.
  • Spam Filters: Thunderbird learns from each email you mark as spam. The service’s popular spam tools have been updated.

Requirements

Thunderbird 52 runs on the following OS:

  • Windows OS. Compatible with Windows XP SP3 to Windows 10.
  • Mac OS. Compatible with Mac OS X 10.9 to 10.13 High Sierra.
  • Linux OS. Compatible with Linux GTK+ 3.4 or higher. However, the Thunderbird website lists several additional requirements.